Adventure Time! BMO stole the show!

Dude. This took forever to get right.

The story goes that I had a bit of spare money left over at the end of the month, so of course I decided to spend it on some yarn. I wanted to order some acrylic yarn from this online store I peruse, even though I am generally against the idea of it. But it was cheap (so sue me) and the reviews I read said it really wasn’t SO bad… Had nice colour and was actually nice and soft blah blah blah. I made the decision to order a crazy random selection of colours, thinking that if all else was lost this would at least end up being a good collection for some small amigurumi things. To be honest I was choosing a selection of green colours with the thought that I could make some crochet cacti garden or something.

Anyway, the yarns finally arrived and all of sudden I had the feeling like hey, I could totally make a BMO from Adventure Time!

I didn’t have a pattern. There was a lot of trial and error. There were a lot of moments where I couldn’t even bring myself to look at the work in progress… But I did it!

Ladies and gents, I present to you, BMO!

Beemo2

Beemo1

I made some notes, analog style… Crazy handwritten pages with many a crossed out scribble, that formed a deeply disturbing narrative of an individual failing several times to attain that right formula… It wouldn’t be out of place in a background shot of Se7en.

What I am trying to say is that I have a pattern. And I WILL translate it into an intelligible set of instructions that I hope to share with you at some stage. But for now, I would like to just sit back and bask in the cuteness that is BMO!

Nawww!

tumblr_nr3eu1axcg1uypfuuo1_500

Coral Points Pillow

Well it’s been busy! Have started my new job which included a couple of months in Germany. All the while trying to find a new apartment to move in to back in Krakow. I finally got back in to town and within a week had moved in to a beautiful new place. Am not used to living somewhere so nice… I still need to get used to having a dishwashing machine… I keep going to hand wash my dishes. #firstworldproblems

Anyway, while I work on that, I have crocheted the first item for the new place! A pillow for the couch (yay I have a couch finally!). And to make matters confusing, here is a pic of it on the armchair. Yeah, I am a proper adult with an armchair AND a couch. Woo!

Coral Points Pillow 1 With LOGO

Made from coral cotton yarn it seems pretty durable. For the cover, I used fabric from old bedsheets that we no longer use. I couldn’t be assed dealing with a zipper, so I decided to try out a envelope style cover (link HERE to the directions I used). The envelope method is like a bajillion times easier than trying to get a hidden zipper in there. Do recommend.

The pattern used is the same one I used for my Blue Jeans Triangle Scarf that I made a little while ago. You can find the pattern on my pattern blog HERE if you are interested! It’s such a nice pattern that’s really easy to execute and can be used in so many different ways.

IMG_20160717_092011_Fotor

Modern Crochet Placemats

The pattern I used for this was a granny circle… How can a pattern that has the word “Granny” in it be called modern?! It’s all about the colours!

Placemats with logo

I am currently in Germany for a couple of months for work, and I must say that choosing which yarns to take with me was one of the single most difficult decisions of the year so far!

IMG_20160515_140341-01

IMG_20160515_140944-01

IMG_20160515_141021-01


Ultimately I think I made the right choice, but it’s still tough to be separated from my full yarn stash for so long!

Let me know if you would be interested in the pattern. It’s a super simple one, and I finished two placemats in one day, so it’d make a nice quick gift!

Happy Easter!

Easter is my favourite holiday. You get a long weekend. You get to eat delicious food and you have no pressure to give presents. And getting sick on chocolate is totally acceptable – so that’s a winner!

In the spirit of things, I crocheted another Bunny using my own pattern that I posted a couple of weeks ago (link here). This time I decided to use thicker yarn and a 5mm hook and the Bunny turned out huge by comparison to the first one!

Hope you like it!

IMG_20160327_143513_FotorIMG_20160327_143533_Fotor

PS. Bonus real bunny pics!

IMG_20160326_144325_FotorIMG_20160326_144342_Fotor


Free Easter Bunny Pattern. Come one. Come all!

IMG_20160222_190001_Fotor

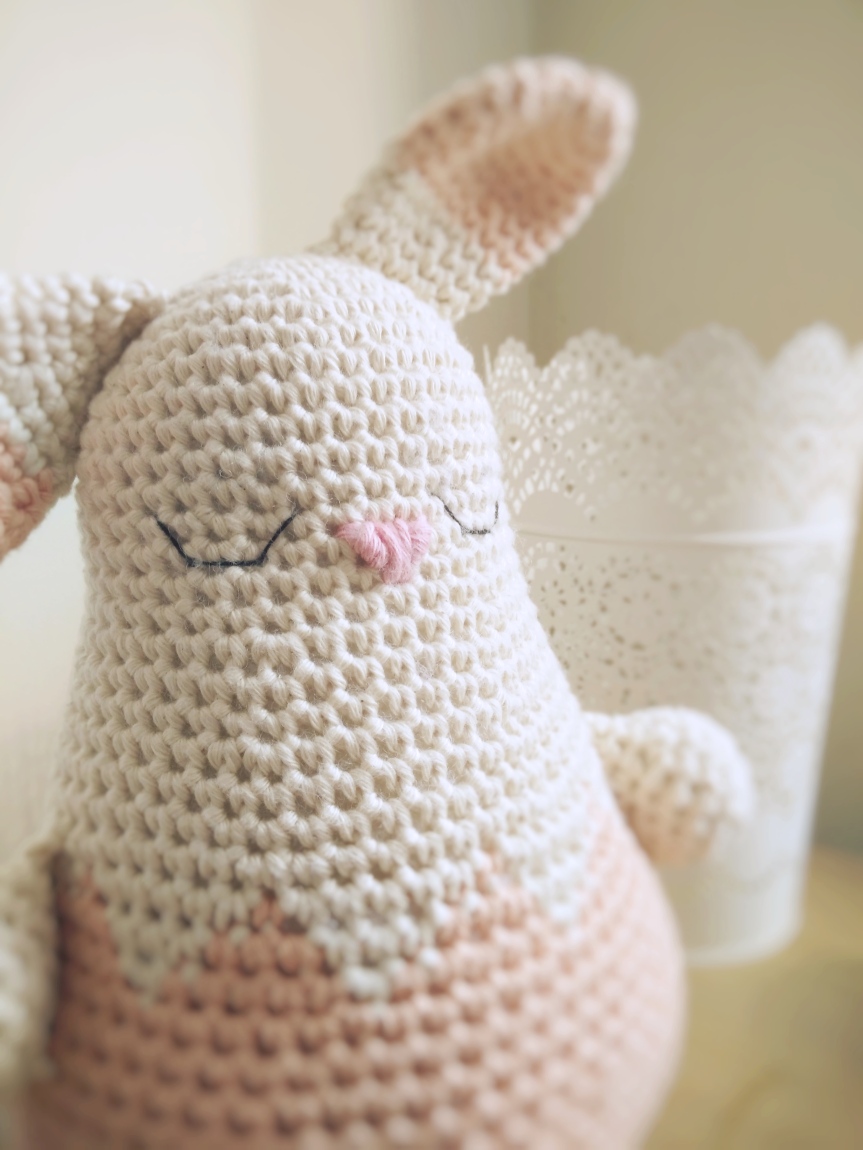
Super cute little crochet plush toys, AKA Amigurumi, can be anything from food, animals or even furniture. Most of the stuff I have done has been food related (see my Donuts, Watermelon Bites and Tutti Frutti set). But I have constantly been keeping an eye on cute little animals to crochet. And with Easter coming up I wanted to get started with more theme crocheting. One of the things I wanted to do was crochet a cute little Amigurumi Bunny. Though to be honest I couldn’t really find any ideal patterns. Call me picky… cos I am. So what happened is I ended up creating my own pattern!

As I am super proud of myself for doing so, I naturally want to share/flaunt/show-off my pattern to anyone who will listen.

Here it goes!

Materials:

Dude, just use whatever yarn you want and get a hook that’s the correct size for it and you’ll be sweet! Just remember that it might work a little better to use a slightly smaller hook than recommended, cos that will tighten up your work and ensure that no stuffing peeks out. Up to you though.

I used a very thin yarn, which can be fiddly and a bit frustrating at times, so if you are a beginner, I would recommend using something a little thicker than I did!

Also a thought – maybe have some other colour threads ready to do some embroidered facial features.

Go nutso with the colours! Make the face unique (search pinterest for Amigurumi faces if you want some inspiration). Give it a belly button, some sunglasses, a butt crack… Make it your own!

You can also create accessories for this guy to give him his own personality. For example:

A city chic scarf from the Winter 2016 catalogue! Rugged up and ready for going out on the town:

IMG_20160222_185758_Fotor

Or a bit of gangsta bling with a dope ass chain:

IMG_20160222_190108_Fotor

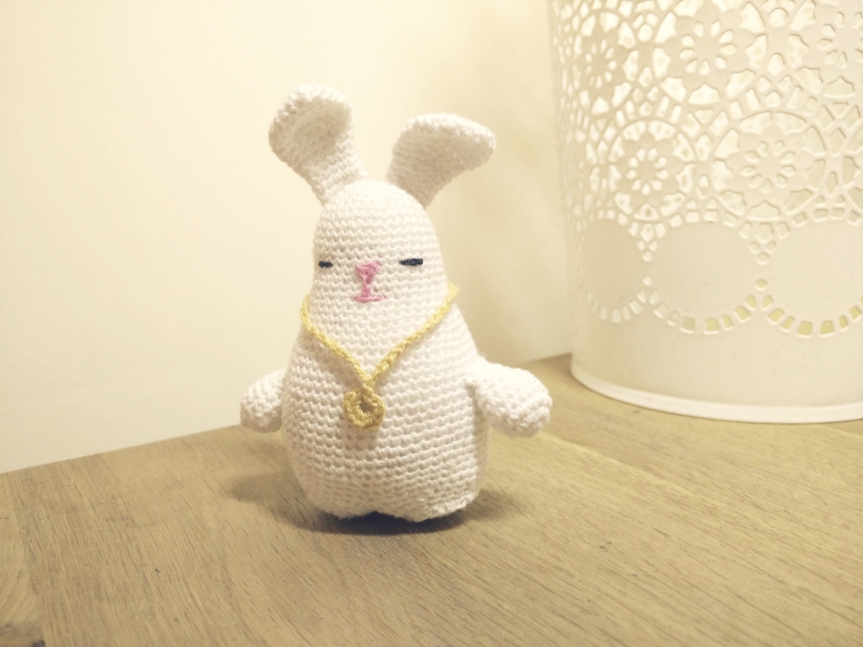
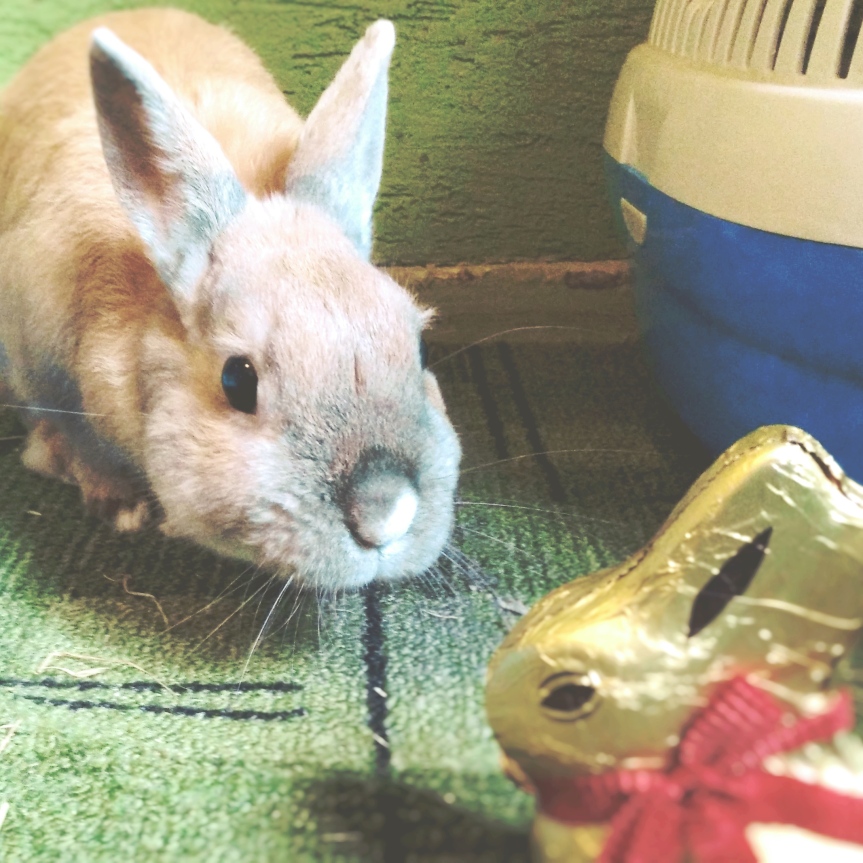
Just to give you an idea of how big this Bunny ends up, I used cotton thread (you know that stuff that you made friendship bracelets with in Grade 6? It’s called Mulina in Polish, but I cannot remember the technical English name) and a 1.5mm hook. It ended up being roughly 7cm tall, and that’s measuring from feet to the top of the head (so, not including the ears).

You’ll also need some stuffing too, obviously.


Notes:

You will be crocheting in the round (spiraling all the way around continuously) so it is essential you use a stitch marker. I was using a safety pin. When I start a round, I will place the stitch marker in the first stitch of that row.

The pattern is very easy and it only uses 4 different stitches/techniques. All four of which I have provided tutorial links to in the abbreviations section. So if you are a beginner, YOU CAN TOTES DO IT! I believe in you.

Oh and if you have any questions, ask away!


Abbreviations:

US Terms Used

Magic Ring = Adjustable loop (tutorial with pictures here)

SC = Single Crochet (tutorial with pictures here)

INC = Single Crochet Increase (this means that you do two Single Crochets in the same stitch. Check out some instructions here)

DEC = Single Crochet Decrease (tutorial with pictures here)


Head and Body:

Start with a magic ring.

  1. 6 SC into the magic ring and pull it tight (6)
  2. INC in each stitch around (12)
  3. * 1 SC, INC * around (18)
  4. * 2 SC, INC * around (24)
  5. * 3 SC, INC * around (30)
  6. * 4 SC, INC * around (36)
  7. SC around (36)
  8. SC around (36)
  9. SC around (36)
  10. SC around (36)
  11. SC around (36)
  12. SC around (36)
  13. SC around (36)
  14. SC around (36)
  15. SC around (36)
  16. SC around (36)
  17. * 5 SC, INC * around (42)
  18. SC around (42)
  19. SC around (42)
  20. * 6 SC, INC * around (48)
  21. SC around (48)
  22. SC around (48)
  23. * 7 SC, INC * around (54)
  24. SC around (54)
  25. SC around (54)
  26. SC around (54)
  27. SC around (54)
  28. SC around (54)
  29. SC around (54)
  30. SC around (54)
  31. SC around (54)
  32. SC around (54)
  33. SC around (54)
  34. SC around (54)
  35. * 7 SC, DEC * around (48)
  36. SC around (48)

FYI – Here’s a good time to stuff da booty.

Now to start on the legs! Count and place a stitch marker in the 24th stitch from your hook. Chain 12 and join it with a slip stitch to where you placed your stitch marker. You should now have two separate sections of 36 stitches each. These will form the legs, and you will do one at a time.

  1. In the first section, SC around (36) – This means you will have 24 SC on the body and the remaining 12 SC will be on the back loops only of the chain (the reason I use the back loops is so that the front loops can easily be used for the second leg…)
  2. * 4 SC, DEC * around (30)
  3. * 3 SC, DEC * around (24)
  4. SC around (24)
  5. SC around (24)
  6. SC around (24)
  7. SC around (24)

Finish off and break the yarn.

Do the second leg on the other section of 36 stitches. Basically, just repeat steps 37-43!

Add extra stuffing if it’s needed.


Bases of the legs:

Two will be needed, obviously.

Start with a magic ring.

  1. 6 SC into the magic ring and pull it tight (6)
  2. INC in each stitch around (12)
  3. * 1 SC, INC * around (18)
  4. * 2 SC, INC * around (24)

No need to break the yarn here, just continue to SC the next round straight onto the legs of the body to join it.

Repeat this with the other leg.


Arms:

You’ll be making two of these.

As usual, start with a magic ring.

  1. 6 SC into the magic ring and pull it tight (6)
  2. INC in each stitch around (12)
  3. * 1 SC, INC * around (18)
  4. SC around (18)
  5. SC around (18)
  6. * 1 SC, DEC * around (12)
  7. SC around (12)
  8. SC around (12)
  9. SC around (12)
  10. Stuff the arm (but not too much) and then pinch the end closed. 6 SC across to close the edge and make it flat.

Finish off, leaving a long tail of yarn to sew to the body.


Ears:

Obviously you’ll also need two of these (unless you want your bunny to look like he’s lived a tough life on the streets)

Aaaaaaand, guess what? Start with a magic ring!

  1. 4 SC into the magic ring and pull it tight (4)
  2. INC in each stitch around (8)
  3. * 1 SC, INC * around (12)
  4. * 2 SC, INC * around (16)
  5. * 3 SC, INC * around (20)
  6. SC around (20)
  7. SC around (20)
  8. * 3 SC, DEC * around (16)
  9. SC around (16)
  10. SC around (16)
  11. * 2 SC, DEC * around (12)
  12. SC around (12)
  13. SC around (12)
  14. SC around (12)
  15. SC around (12)

Finish off, leaving a long tail of yarn to sew to the body later.


Tail:

This is up to you what colour you want to do this in. Or if you want to do this at all. Maybe you wanna use a pom pom instead? I dunno… Up to you! However I will give you the pattern for what I did just in case you want it:

IMG_20160222_185911_Fotor

Say it with me now: “Start with a magic ring!”

  1. 6 SC into the magic ring and pull it tight (6)
  2. INC in each stitch around (12)
  3. 1 SC, INC, 2 SC, INC, 2 SC, INC, 2 SC, INC, 1 SC (16)
  4. 3 SC, INC, 3SC, INC, 3 SC, INC, 3 SC, INC (20)
  5. 4 SC, INC, 10 SC, INC, 4 SC (22)
  6. SC around (22)
  7. SC around (22)


Assembly

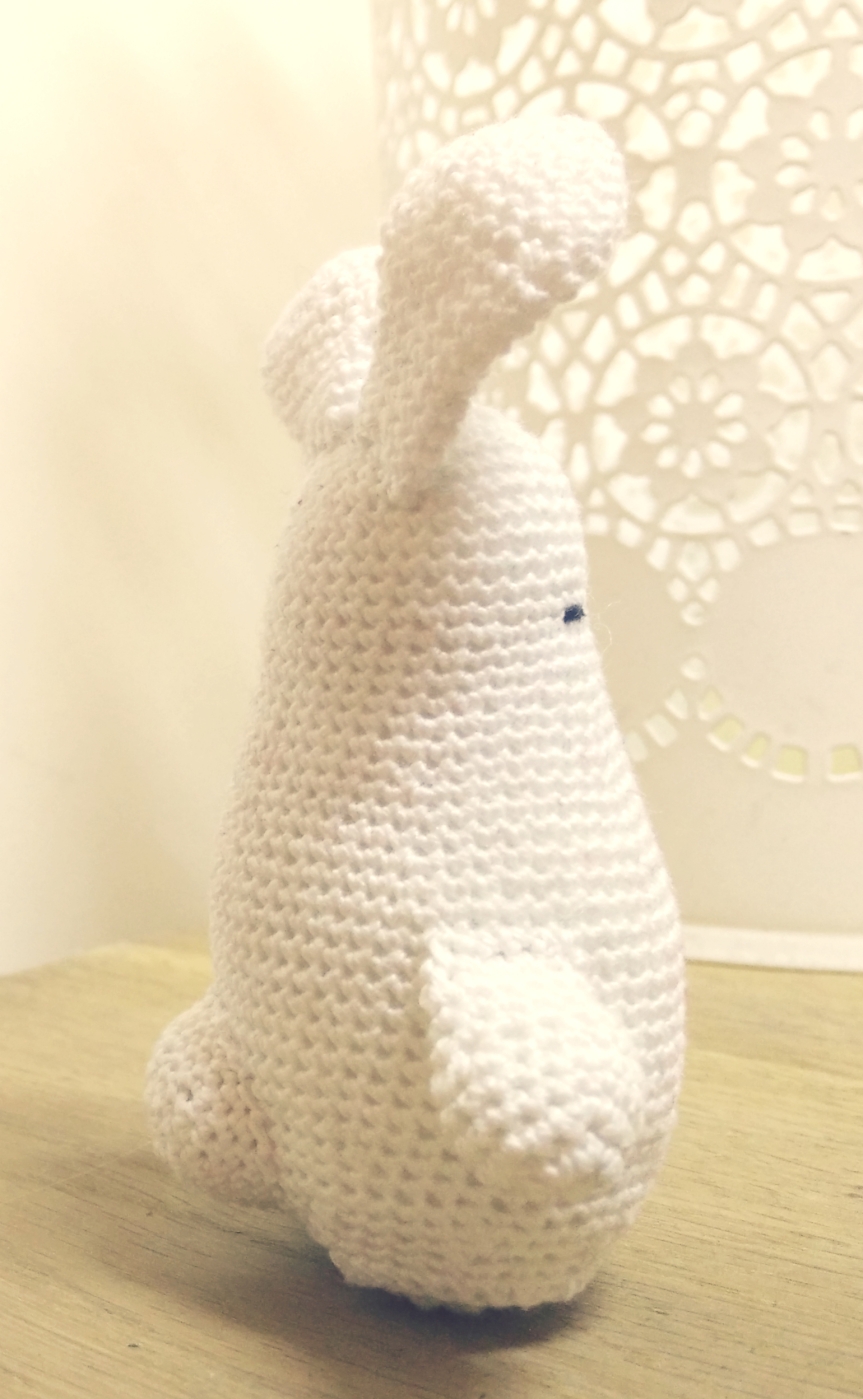
Sew those bits and bobs onto the body YO! Use my pics as reference, or just play around with the positioning. Maybe the arms will look cuter if they are more in front, or higher on the body? Maybe you want those ears to flop down the side of the head?

One thing I do recommend though – don’t stuff the ears. They are rigid enough to stand up on their own. Also, if you leave out the stuffing of the ears, you have more options to shape them!

EDIT

I made another bigger version of the Easter Bunny! Using the exact same pattern except with thicker yarn and a larger hook:

IMG_20160327_143533_Fotor

IMG_20160327_143513_Fotor

Sleepy Dino

Well it is indeed a happy new year! My friend is about to have her first baby and while I’ve had my fingers crossed the baby will be a healthy and chubby little ball of cute, I’ve also been working on my first ever baby toy!

Meet the Sleepy Dino!

Sleepy Dino3

It’s made out of 100% cotton yarn and measures about 40cm from head to tail. Which should make a nice toy for my friend’s little one to grow up with!

The pattern used was a little bit complicated in the beginning as it is worked continuously in the round. But lots of careful stitch marker use and intense concentration got me through! If you are a crocheter yourself you can find the pattern for free over at The Button Ship.

And just for good measure here’s one more picture, all ready to travel:

Sleepy Dino2


Taxidermy Crochet

I really needed to share this awesomeness.

Little taxidermy crochet wall pieces! Argh! These are the best!

tumblr_lw3thq1vpv1r83dubo1_1280

These were created by an artist named Sarah Grace. I had trouble finding much on her via google. But I reckon you should take a look at the gallery I found here: http://fiber.thesarahgrace.com/

The world needs more of this type of adorable crochet!

Some of her other pieces:

tumblr_lw3sj9u95d1r83dubo1_1280

tumblr_mb0sox3ycv1r83dubo1_r1_1280

tumblr_lw3seuwebz1r83dubo1_1280

You don’t make friends with salad

In my last post I mentioned the donut ornaments I was making for my Christmas tree. Well, after some tweaking and perfecting – here’s the final product!

donut5

The best part of making these donuts is the amount of customisation I can do. I can use SO MANY COLOURS!

This one’s made with chocolate dough, vanilla icing and rainbow sprinkles…

donut3

Next you’ve got your classic dough with pink icing and a white stripe drizzle…

donut2

And finally there’s the light blue icing with chocolate sprinkles!

donut1

Argh! YUM-BO-REE-NO. So much sweetness, and all from yarn! Zero calories yo.


tumblr_mr2qzwlgx71sacjkao1_500

Frankensteins Monster of a Tree

So my apartment is tiny. I wonder if I’ve ever made a post without mentioning that. Whatever though, because even though I don’t have much space, I can still get myself a Christmas Tree and that makes me super happy!

There’s a market near me that sells… Hmm, not sure how to describe it except to call them “mini semi-fake trees”.

OK. I am sensing more descriptives are needed here. But basically what they do is use small branches of real trees and stitch em together onto a post to make a mini version of real full-sized tree. It’s like a Frankensteins monster of a tree!

Anyway, there are real pine needles and it’s the perfect size for my apartment. Check and CHECK.

I still have plans to make more decorations for the tree. But I don’t know how much more this little guy will take before he keels over.

Photo time!

IMG_20151216_181057_Fotor6

I’ve got my little Tutti Frutti and Watermelon Bite ornaments in there. PLUS, I’ve got some crocheted donut ornaments up in that thing, which my boyfriend keeps threatening to eat because they look so tasty. Ahhh Christmas… You pretty!

IMG_20151216_180959_Fotor

How are your Christmas decorations coming along?

Tutti Frutti Ornament Set

Oh man, these make me crave candy so badd.

Tutti Frutti Style sheet1

I can’t wait to hang these on the Christmas tree. Although at the moment they are just hanging in my chilli plant I’ve got on my windowsill.

IMG_4141

If you want a set of your own, contact me! (I will update this post with a link to my shop once I have it up and running!)

The set contains five Tutti Fruttis, so when you order one set for €12.50 you will get the following –
1x Blood Orange
1x Lemon
1x Orange
1x Lime
1x Pink Grapefruit

Each fruit is about 6cm long and 3cm across and is crocheted on both sides. It has a crocheted yarn loop to allow for hanging. Each fruit is also stuffed with cotton to give it some dimension.

tumblr_noyzmlMXty1unmbvxo1_400